First of all, you will need a GitHub account, if you already have one you can skip right ahead to the next section. A GitHub account is a good idea even if you are not working with someone else on the same code. It is a backup of your code, in case something happens to your computer. It can also serve as your portfolio and can come in handy when you want your project to be available online for others to see. Setting up a GitHub account is pretty straight forward. We will continue here as if you have just set up your account.
Working with Git: Working with others on your code
Welcome back to part 2 of our ‘Working with Git’ series. This article will dive deeper into working together on the same code through branches and GitHub. If you haven’t read part 1 I suggest you read that first, you can find it here.
Free GitHub account
Set up a new repository in GitHub
A repository is the place where all of the code for your project lives. This is probably a folder on your computer right now and on GitHub this is called a repository, or repo for short. We will create a new repository on GitHub for your project. When you get to the page where you set up a new project it will look like this.
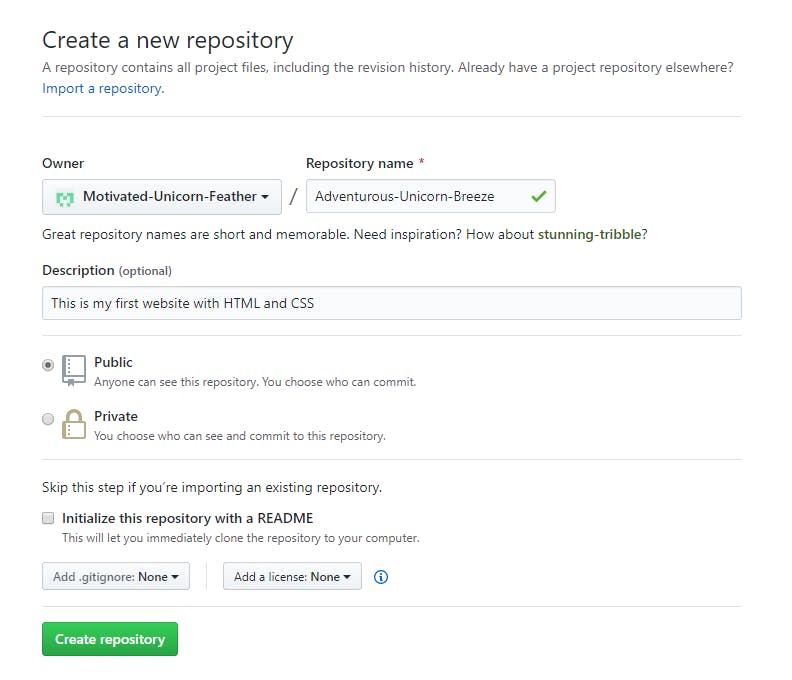
Create a new repository screen on GitHub.
Fill in your project name in the field for your repository name. It is easy, and it makes a lot of sense, to keep this name the same as your project as they both will have the code from your project. My project for this tutorial is called ‘Adventurous-Unicorn-Breeze’, so I put that as the name for my repository.
You can also add a description for your project, but this is not mandatory and you can always come back to this later. I will write a short description in mine: ‘This is my first website with HTML and CSS’.
After this you will have to choose between a public and private repository. The difference between the 2 is who can see your code on GitHub. If you have a super secret project and don’t want anyone to see what you’re working on, choose Private. If you want to share your code and have the possibility that others can view, learn and copy from it, then Public is the right setting. For now we will choose Public and continue. We will skip the step for creating a README with the repo as we already have an existing project.
Set up remote origin
On the next page on GitHub you will see the following screen.
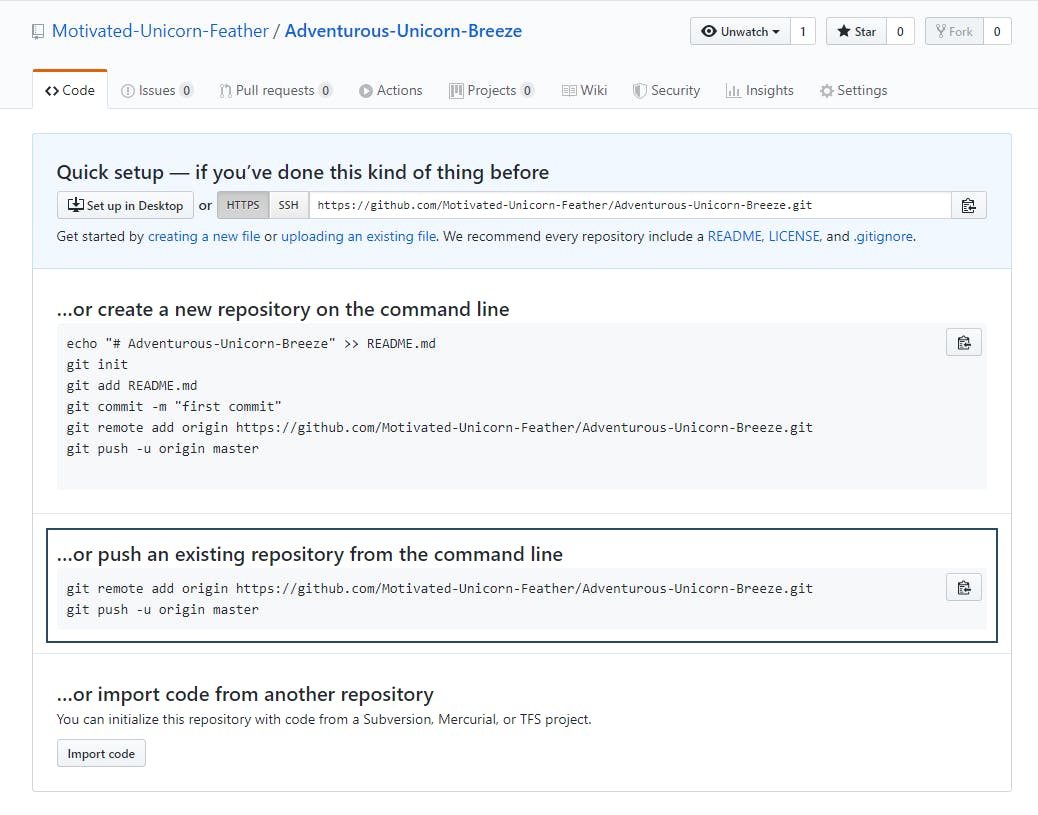
We need the ‘ ...or push an existing repository from the command line’ option.
The option we need is the ‘ ...or push an existing repository from the command line’, outlined in the image above.
Now you need to open your terminal again, and make sure you are located in your project folder but not in a subfolder. When you are there, write the first command and press enter.
You will probably not see anything happening, but under the hood, something definitely happened; your GitHub repository is now set up as the remote version of your project. Now enter the second line in your terminal (the git push -u etc. line) and you will probably get a GitHub pop-up. You get this because GitHub wants to make sure you have access to that repository and are not just anyone sending code to the project.
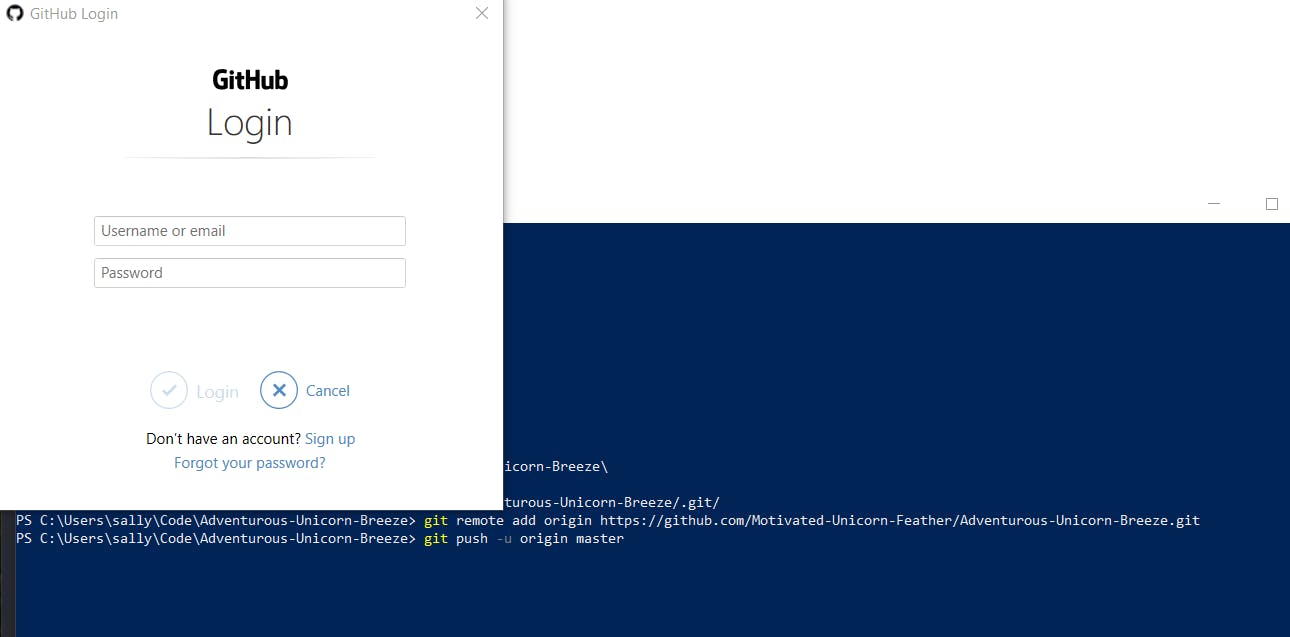
Fill in your details in the GitHub pop-up.
Fill out your details and press login. It should now have worked!
However there is a small chance that you will run into the following error on the 3 top lines:

You might run into this little error.
Don’t panic, this happens sometimes. It will ask you for your username in the terminal, type it in and press enter. It will then prompt you for your password. Type that in (note how you will not see any characters appear, this is normal, just keep typing) and hit enter. It should now spit out the rest of the lines and you know it worked when you see ‘Branch ‘master’ set up to track remote branch ‘master’ from ‘origin’.
Let’s check our work in GitKraken.

How we can see what changed in GitKraken.
First we had the top image, note how on the left panel, we have LOCAL and below that we see our master branch. Now that we have set up a remote repository we have the image below in Gitkraken. We have a remote master branch as well.
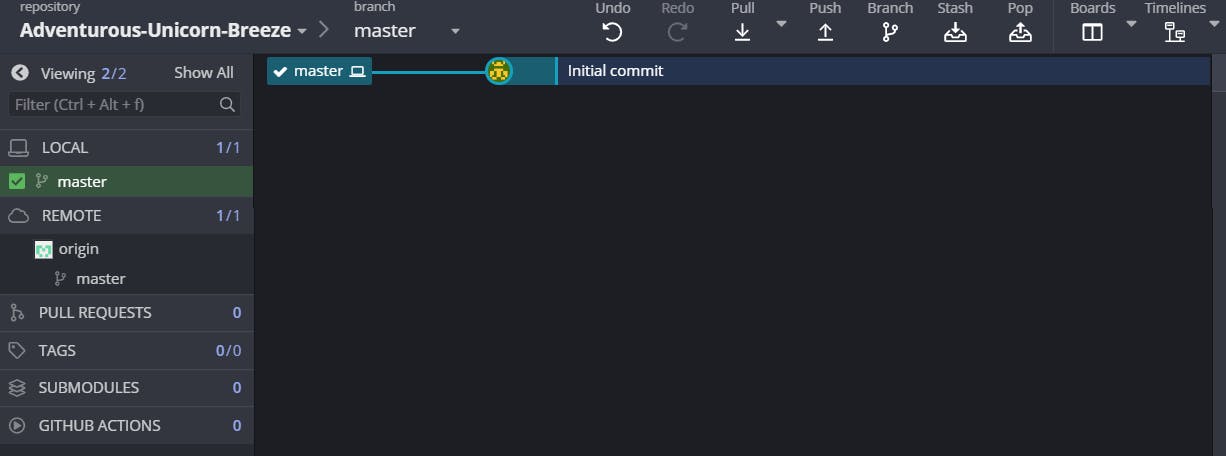
We can see we now have a master branch in the Remote panel.
If you go back to GitHub and your repository, you should see that it now has the same initial commit as you see in your GitKraken overview.
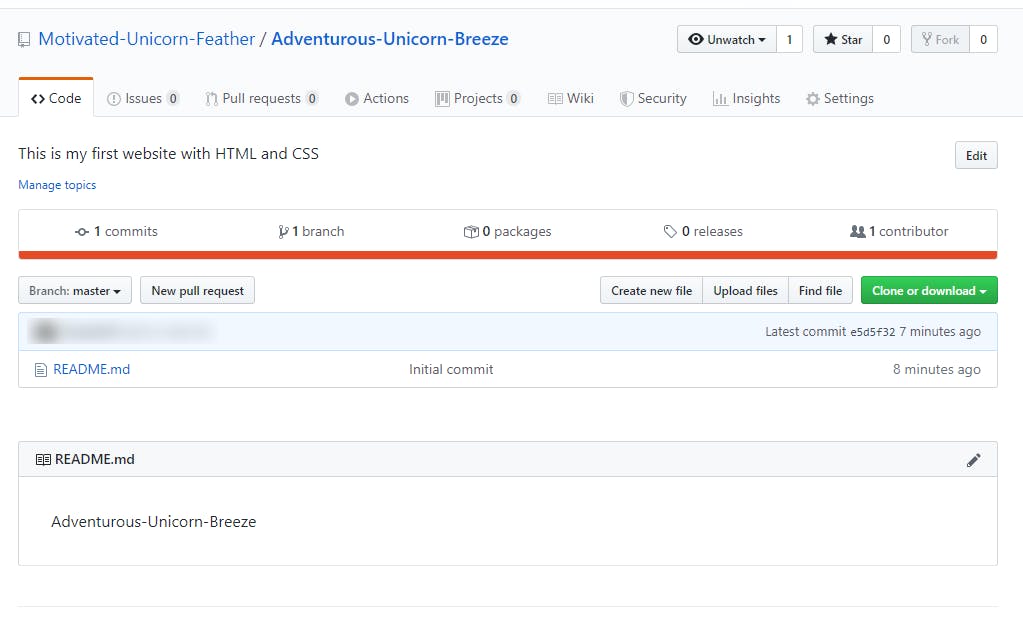
What it looks like on GitHub now.
Pushing and pulling
Now that we have GitHub set up, there are 2 places that have identical code right now. But let’s say we make some changes on our computer to our code and commit that with GitKraken. That is not automatically synced with GitHub, we need to ‘push’ that code to GitHub so it is added to our repository there as well. In GitKraken at the top you will find the push button. After you make a commit or a couple of them, don’t forget to hit that push button to make sure your code is safely stored on GitHub.
Pulling is the opposite of pushing, so you might be able to guess what pulling does already. If there is a commit on your master branch on GitHub that your local version does not yet have. For example, someone else wrote some code and added it to the master branch on GitHub. You can pull from the master branch and your version will be updated with the code from there.
Branches
Usually the master branch of a project is the version that is live on the internet ready for everyone to see. If we make changes and commit that while we are still working on it, we might break the live version of the website. Or if something takes a few days to build, it will not yet work when you stop working on it for the day. You don’t want that half finished feature to go live straight away right? That is why it is very common to work on a different branch than the master branch. A branch is basically another version of your project. A project can have many different versions and therefore branches.
In development it is very common to have a branch called development, or develop, or just dev for short. On this branch you can make changes and try things out before putting them live for the world to see. Let’s create a develop branch with GitKraken.

The Branch button
Press the branch button in GitKraken and name it develop. A little pop up will appear telling you the branch was created and that you have switched to that branch. Every time you create a new branch, GitKraken switches to it automatically.

On the left you will see your Develop branch highlighted.
Now on the left side, you will see develop highlighted in the Local section. You will not see it in the Remote section right now. As we haven’t pushed it to GitHub yet, GitHub has no idea we created a new branch.
If you make changes in your code and commit them you will see something happen in your GitKraken overview. It will look a bit like this:

A first commit on a new branch
You will see your latest commit (in my case that is ‘Add introduction to homepage’) at the top and to the left of it you will see your develop branch mentioned. Now, I want to make sure this change is saved on GitHub as well. My clumsiness can knock over a glass of water any minute and I might have to continue working on this on another computer. I want to make sure my important newly added code is still available. So let’s hit that push button. GitKraken will prompt you with the question of what remote branch you want to connect to this develop branch, as GitHub doesn’t have this branch yet. If you don’t enter an alternative, it will use the local branch name for this. Let’s go with that and click submit, so our develop branch on our computer is linked to the develop branch on GitHub. You will now be able to see your branch in the left panel under Remote as well!
Working with other developers
When you are working on a big project, you will most likely not work on your project alone. You will be working together with other developers. Each will work on their own feature or story or ticket or bug, whatever they are working on. Let’s look at an example: you and another developer are both working on adding something new to the website. You are adding something to the homepage and she is fixing a bug on the about page. If you are both working on the development branch, making commits, pushing them, and pulling each other's changes regularly and at some point the website breaks, who’s code broke the website? Yours or hers? That is a bit tricky to find out and a bit of a waste of time as well.
This is why you both create your own branch for whatever you are working on. This is often called a feature branch. If you are adding a pricing section on the homepage, your branch could be called ‘pricing-block’ or ‘pricing’. Unlike commit messages which need to be very specific and where you have a bit of room to do that, branch names should be relatively short and easily recognizable for what you are working on. Most branches will be deleted later on, when they are complete and no longer serve a purpose.
Switching branches
While you are working on your branch, your co-worker might ask you to check out her branch and test something. What she means is, she’d like you to switch to her branch, her version of the project and test something with her code. Make sure your code is committed and pushed before you switch to her branch. Her code is also committed and pushed, so it is on GitHub, ready for you to find it and get it. This is called fetching. Next to the Pull button in GitKraken you will see a little arrow, from the dropdown menu select Fetch all. This will make GitKraken update all the remote branches listed in the left-side panel. You should be able to find your co-worker’s branch name in the list in the Remote section. Simply double click it and you will switch to it or perform a ‘checkout’, as it is technically called. Your co-worker’s branch is now listed under Local, and our project folder will contain her code. The code you were working on is now no longer visible, but don’t worry, it is safely stored on your own branch. When you are ready to switch back to continue working on your own branch, just double click on it and you will switch back again.
Now that we are set up with branches and a remote repository, it is time to get to work on your project. Create a branch for a feature you’re going to build and try it out. Next time we will look at how to get the code from your branch to the master branch (merge branches through pull requests), and how to do code reviews on pull requests. Code reviews are an excellent way to learn and to ensure the quality of (your) code.
